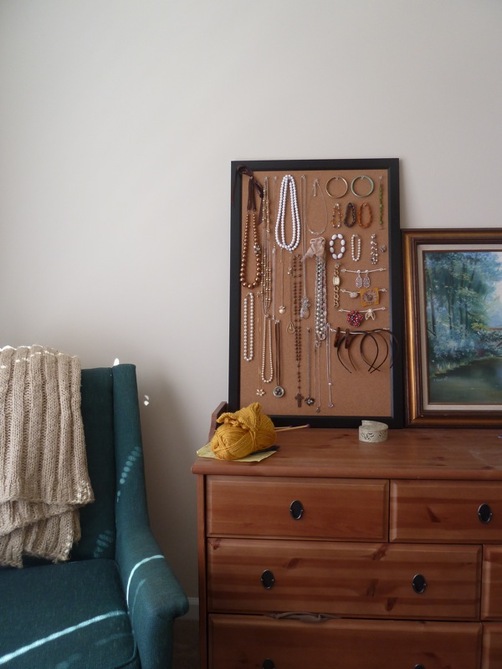
Look what I made! I used a cork bulletin board to display my jewelry! I thought about editing out Jared's t shirt sticking out of the drawer. But I decided against it, because quotidian details are charming aren't they?

I love this so much! Let me count the ways (literally, I'm going to count them).
1) It keeps my jewelry organized and untangled.
2) It helps me see what my jewelry options are so I can make my choice quickly.
3) It reminds me how much jewelry I have and will help me avoid buying more (because I only have a few square inches left to display any new jewelry!)
4) It's pretty!!
Would you like a similar display for your jewelry? Here's what you do!
1) Buy a cork bulletin board with a frame. I got mine at Target for $15. There was a white logo in the corner, I just drew over it with permanent marker.
2) Buy clear, so they're less noticeable, push pins. I got these at Target, too.
3) Push the pins into the board and hang your jewelry on them! Try to mix different textures and colors so it looks interesting.
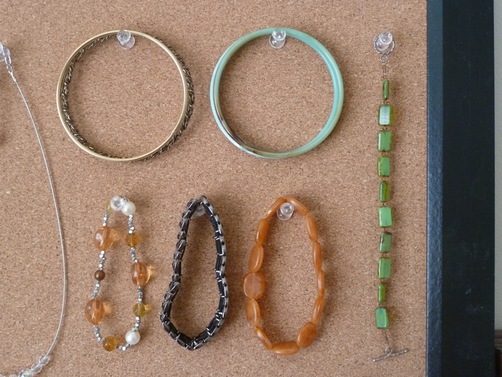
I grouped my jewelry into different categories, necklaces, bracelets, earrings, brooches.
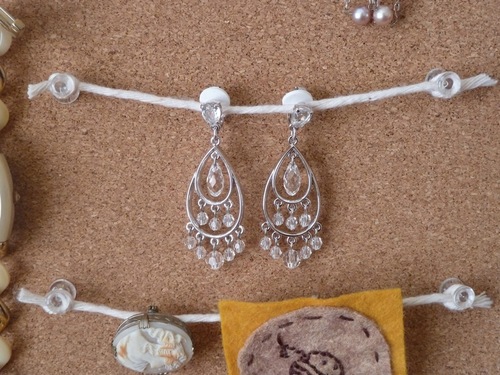
I hung the earrings and pins on baker's twine tied between two pins. You could use any type of string you have on hand, or even wire! Full disclosure: my ears aren't pierced! That's why I only have this one pair of earrings. It's hard to find cute clip ons!
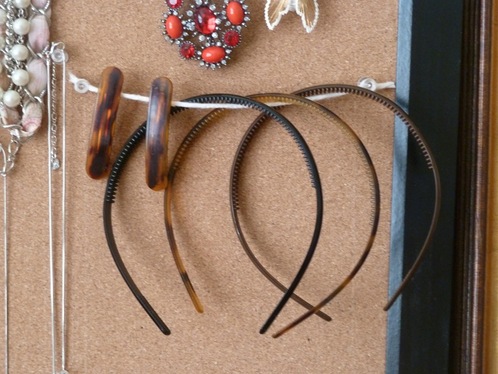
I even displayed my small collection of hair accessories. Maybe I'll use them more often now that I can see them!
This project is way customizable, you could paint the frame a different color, or use a vintage frame! You could cover the cork with a pretty fabric before you pin your jewelry on. I prefer the plain cork board because it provides a nice neutral palette. Plus, most jewelry pops out in contrast to the light brown color. Also, the cork board gives me an academic vibe, kind of like those beautiful insect display cases!
I was inspired by the many beautiful pictures of jewelry display ideas on Pinterest. Do you use Pinterest? If so, you should follow me! Just click on the red button on the right bar!
This might just be the most satisfying DIY project ever. It only took about 30 minutes, was inexpensive, and I love the results. What do you think?

 RSS Feed